Hardware Components
The previous article discussed the ESP32 code—specifically, how to integrate the MQTT library and configure the high/low logic levels.
This article details the specific hardware components used and their associated costs.
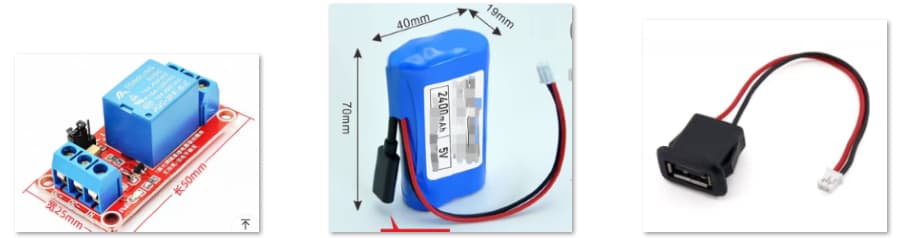
The first item on the left is a single-channel 5V relay module. This allows for the independent control of a single power switch, operating at a voltage of 5V (the ESP32 supports both 5V and 3.3V). (Approximate price: $2.00)
The item in the center is a small power bank module. It features an XH2.54 connector interface, which allows it to be directly wired to the positive and negative terminals of the relay module. (Approximate price: $0.50)
On the right is a female USB port module. This is used to interface with various USB-powered devices. I purchased this primarily for safety reasons; without it, other peripherals—such as a USB-powered air pump—would require direct wire soldering. (Approximate price: $0.30)
The total cost for these components comes to approximately $3.00.
In contrast, commercial products—such as the Xiaomi Smart Socket 3—typically cost around $10.00 each. Furthermore, they do not integrate seamlessly with Home Assistant, and since they operate at a mains voltage of 220V, they pose a relatively higher safety risk. Such commercial products are suitable for standard household appliances but are ill-suited for custom USB-powered devices.
With a custom ESP32-based setup, the system remains fully functional even if the internet connection is lost—whether via Bluetooth or the local Wi-Fi network. Additionally, there is no need to worry about cloud-based data being monitored or deleted.
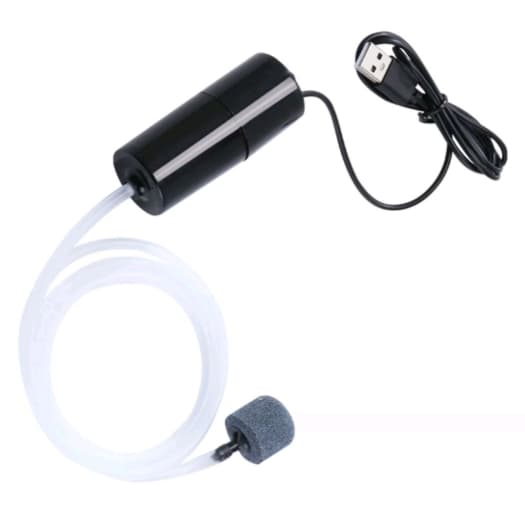
Air Pump (Aerator)
This device is placed inside the fish tank to provide oxygen for the small fish. (Approximate price: $1.50)
I primarily use this setup for hosting “unmanned” live streams on YouTube; specifically, a user can post a comment containing the word “air” to trigger the pump and provide oxygen for 5 seconds.
Since it is USB-powered, I prioritize selecting USB-based peripherals for other equipment as well—such as automatic feeders, plant grow lights, and other accessories. Operating at lower voltages generally ensures a higher level of safety.
Summary
The ESP32 chip itself costs around $3; when factoring in components such as relays, batteries, and air pumps, the total cost for a complete setup comes to approximately $8–10.
A prerequisite for this setup is having your own Home Assistant instance (which can be deployed via Docker on a PC or a router) and your own MQTT broker (a cloud-based server is recommended to ensure constant availability, though an internal-network Docker deployment is also an option).
All my device communication is routed through MQTT. Whenever possible, I prioritize using the built-in capabilities of Home Assistant and ESPHome; for tasks requiring custom data handling or specific operations, I utilize MicroPython scripting—a method that allows for the rapid implementation of small, specific functions.